TL;DR
- Position the couple centered under the arch
- Use natural light and reflectors for optimal illumination
- Experiment with different angles and perspectives
- Consider the arch as a framing element
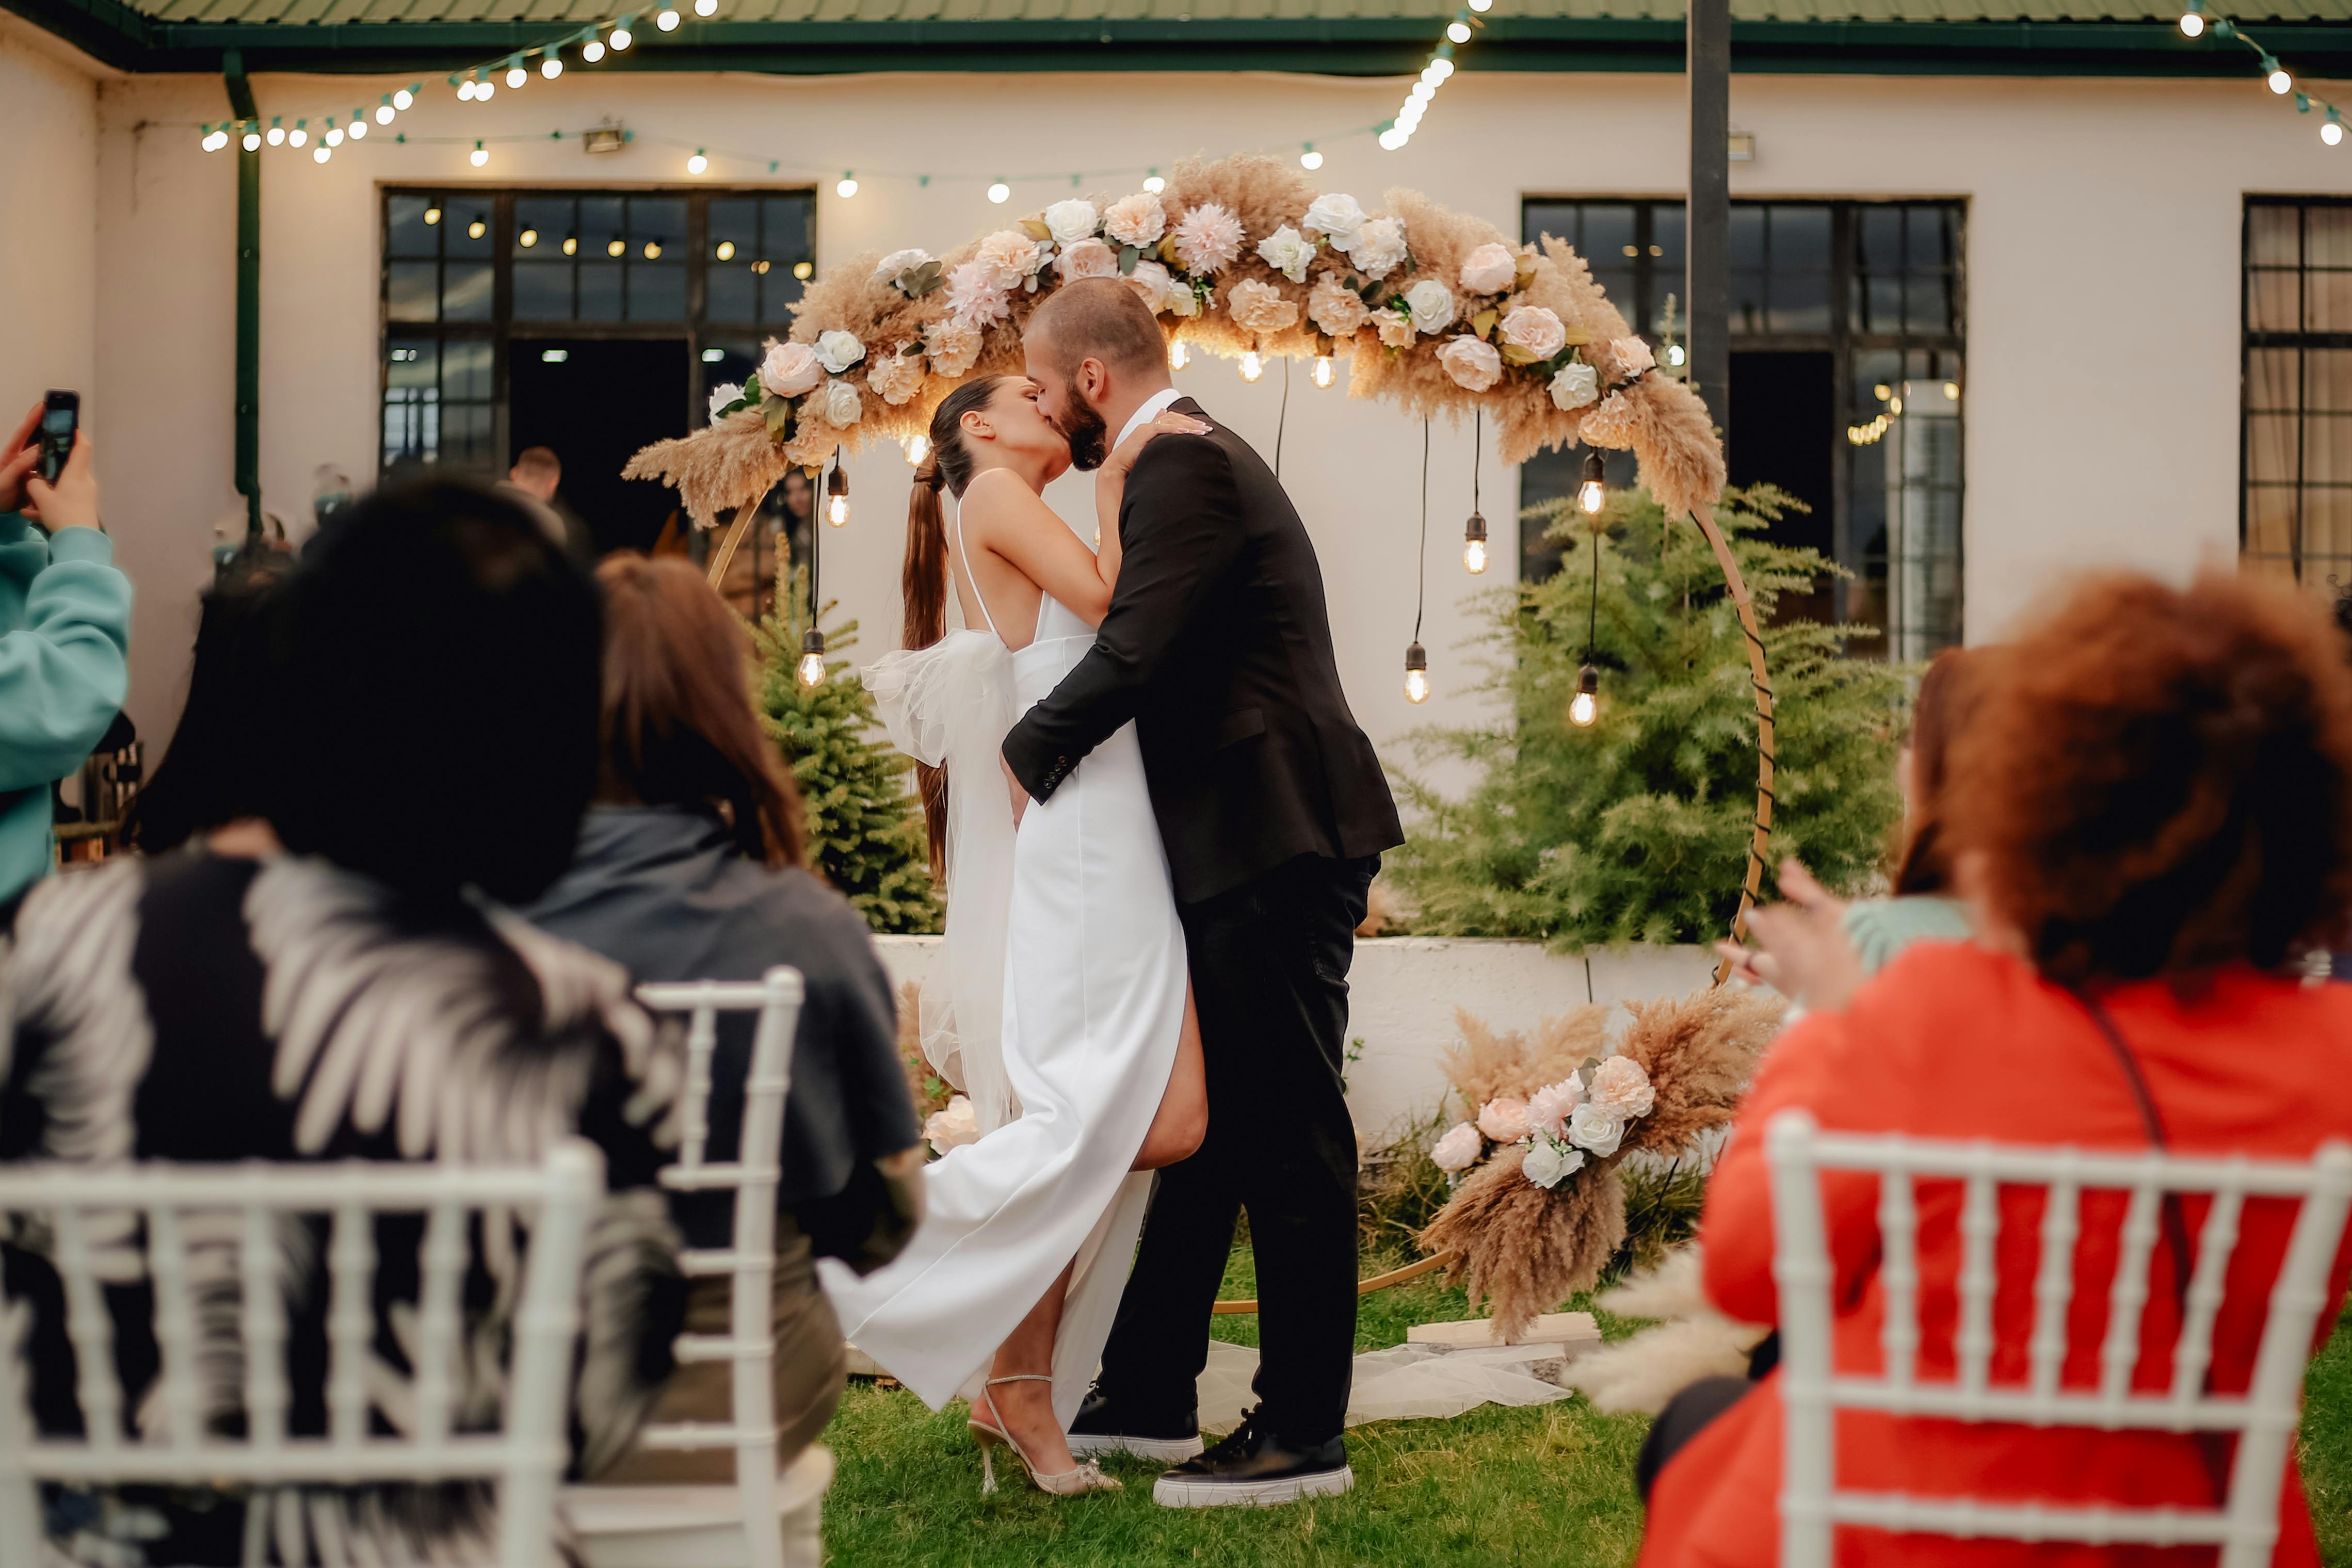
Wedding arches create some of the most iconic and romantic photographs of a couple’s special day, but capturing them beautifully requires understanding composition, lighting, and timing. As a wedding planner who collaborates closely with photographers, I know that the arch’s curved lines and decorative elements offer endless creative possibilities. However, poor positioning or lighting can make even the most stunning arch look flat and uninteresting.
The key to great arch photography lies in treating the arch as more than just a backdrop—it’s an active element that frames the couple and enhances the emotional impact of the image. With the right techniques, you can transform ordinary ceremony moments into extraordinary photographic memories.
Understanding Arch Photography Fundamentals
The Arch as a Framing Device
Use the arch’s natural curves to draw the eye toward the couple.
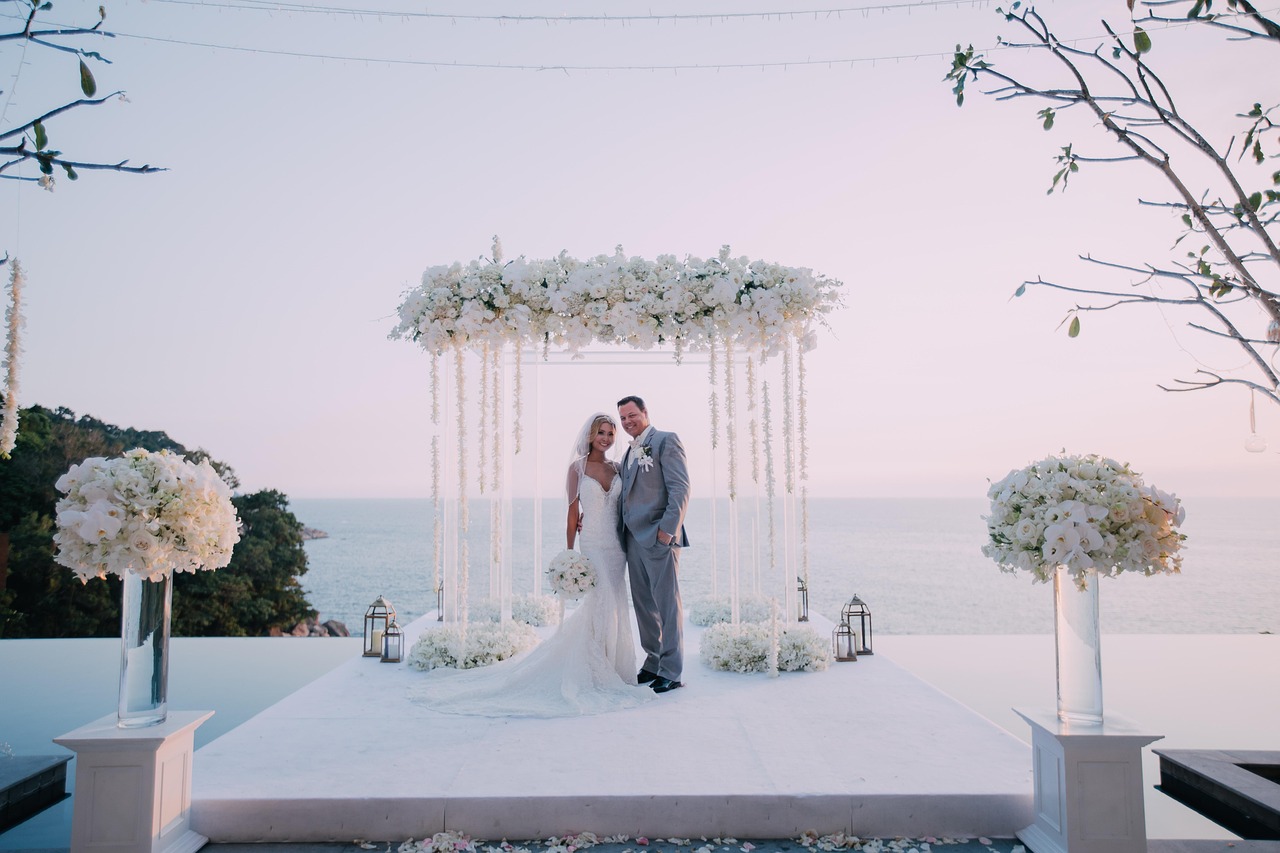
Position the couple slightly off-center within the arch’s curve to create visual flow. The arch’s shape naturally guides the viewer’s gaze, making it an ideal framing element. Think of the arch as a window through which we’re viewing the couple’s love story.
Lighting Considerations
Natural light creates the most flattering and romantic results.
Photograph during the golden hour (just after sunrise or before sunset) when light is soft and warm. Avoid harsh midday sun that creates strong shadows. For indoor ceremonies, use available light from windows or doors, supplemented with reflectors to fill shadows.
Timing and Moment Capture
Coordinate with the ceremony flow for authentic, emotional shots.
Capture the processional as the couple approaches the arch, the vows exchange beneath it, and the recessional walking away. These moments create natural movement and emotion that static poses can’t replicate.
Essential Camera Angles and Positions
Frontal Arch View
The classic approach that showcases the arch’s full beauty.
Position the camera directly in front of the arch, with the couple centered beneath the peak. This angle emphasizes symmetry and allows the arch to frame the couple perfectly. It’s ideal for formal portraits and the vows exchange.
Side Profile Angle
Creates depth and shows the arch’s curve elegantly.
Photograph from the side to capture the arch’s three-dimensional shape. This angle works particularly well for tall arches and provides a more dynamic composition. Position the couple so their faces are visible while showing the arch’s full profile.
Elevated Perspective
Shoot from above for unique, artistic compositions.
Use a step ladder or elevated position to photograph down through the arch. This creates a sense of ceremony and can include more of the venue in the background. It’s especially effective for garden weddings with scenic surroundings.
Low Angle Shots
Add drama and emphasize the arch’s grandeur.
Photograph from ground level looking up to make the arch appear more imposing. This angle works well for Gothic or large arches and creates a sense of awe. Be careful not to distort facial features too much.
Behind the Arch
Capture the couple through the arch’s framework.
Position the camera behind the arch looking toward the couple. This creates a layered effect with the arch in the foreground. It’s particularly effective for arches with intricate decorations or transparent elements.
Composition Techniques
Rule of Thirds Application
Use this classic rule to create balanced, engaging images.
Imagine dividing the frame into thirds both horizontally and vertically. Position the couple along these lines, often with the arch’s peak at the top third intersection. This creates more visual interest than centering everything.
Leading Lines
Utilize the arch’s curves to guide the viewer’s eye.
The arch’s natural shape creates leading lines that draw attention to the couple. Enhance this by aligning the couple with the arch’s curve. Include elements like aisles or pathways that lead toward the arch.
Negative Space
Don’t fill the frame—use space to enhance impact.
Leave breathing room around the couple, especially above their heads within the arch. This creates a sense of openness and allows the arch’s shape to be fully appreciated.
Layering Elements
Incorporate foreground interest for depth.
Include flowers, candles, or venue elements in the foreground to add depth. This technique works particularly well with transparent or lightly decorated arches.
Lighting Techniques for Arch Photography
Golden Hour Magic
Schedule key photos during optimal lighting times.
The warm, soft light of golden hour creates beautiful skin tones and long shadows that add dimension. The arch’s curves cast gentle shadows that enhance its shape without being harsh.
Reflector Use
Bounce light to fill shadows and illuminate faces.
Use white or gold reflectors to bounce sunlight onto the couple’s faces when shooting with the sun behind them. This prevents silhouettes and ensures the couple is properly exposed.
Indoor Lighting Solutions
Work with available light and add subtle enhancements.
For indoor ceremonies, position near windows for natural light. Use off-camera flash with diffusers to avoid harsh shadows. LED lights on the arch itself can add magical illumination for evening shots.
Backlit Silhouettes
Create dramatic effects with careful exposure.
Position the sun behind the couple for silhouette effects, then expose for the arch’s details. This creates a romantic, ethereal look that’s perfect for artistic shots.
Posing Strategies
Natural Couple Posing
Let authentic moments shine through.
Rather than forced poses, capture genuine interactions. Have the couple face each other, hold hands, or share a laugh beneath the arch. These natural moments create more emotional, memorable images.
Incorporating Movement
Add dynamism to static scenes.
Capture the couple walking toward the arch, adjusting each other’s attire, or dancing beneath it. Movement adds energy and tells a more complete story of the day.
Group Photography
Include family and wedding party in arch shots.
Position the couple in the center with others arranged around them. Use the arch’s width to accommodate larger groups. This creates beautiful family portraits with the arch as a unifying element.
Alternative Perspectives
Think beyond traditional portraits.
Photograph the couple’s hands, rings, or feet beneath the arch. Capture details of the arch’s decorations. These creative shots add variety to the photo collection.
Technical Photography Tips
Lens Selection
Choose lenses that complement arch photography.
Wide-angle lenses (24-35mm) capture the full arch and venue. Portrait lenses (50-85mm) isolate the couple within the arch. Zoom lenses provide flexibility for different compositions.
Aperture Settings
Control depth of field for creative effects.
Use wide apertures (f/1.8-f/2.8) to blur the background and make the couple pop against the arch. Narrow apertures (f/8-f/16) keep both the couple and arch in focus.
ISO and Shutter Speed
Balance settings for sharp, well-exposed images.
Keep ISO low (100-400) for minimal noise. Use shutter speeds of 1/125 or faster to prevent camera shake. In low light, increase ISO gradually rather than sacrificing shutter speed.
White Balance
Ensure accurate color reproduction.
Set white balance to match the lighting conditions. For golden hour, use the daylight setting. For indoor mixed lighting, use auto white balance or custom settings.
Common Challenges and Solutions
Wind and Movement
Stabilize for sharp images in breezy conditions.
Use faster shutter speeds or monopods for stability. Time shots between gusts. For flowing fabrics or flowers, embrace the movement for artistic effect.
Backlit Conditions
Manage exposure for challenging lighting.
Use exposure compensation to avoid underexposing the couple. Add fill flash or reflectors. Consider HDR techniques for high-contrast scenes.
Crowded Ceremonies
Work efficiently in limited time.
Pre-plan shots with the photographer. Use a second shooter for different angles. Focus on key moments rather than trying to capture everything.
Weather Contingencies
Have backup plans for outdoor shoots.
Know the venue’s covered alternatives. Use diffusers for harsh light. Have indoor portrait options ready.
Post-Processing Considerations
Editing Workflow
Enhance photos without overdoing it.
Adjust exposure and contrast to bring out arch details. Use subtle sharpening for crisp lines. Apply warming filters to match golden hour lighting.
Color Correction
Maintain the wedding’s color palette.
Ensure the arch’s colors match the overall wedding aesthetic. Adjust white balance for consistency across different lighting conditions.
Retouching Ethics
Preserve the authenticity of the moment.
Remove distractions like litter or blemishes, but avoid altering the couple’s appearance dramatically. Maintain the natural beauty of the arch and setting.
Working with Professional Photographers
Communication is Key
Discuss arch photography expectations early.
Share arch design details and preferred styles. Discuss must-have shots and creative freedom. Review portfolios to ensure style alignment.
Timeline Coordination
Plan photo sessions around ceremony flow.
Schedule formal arch portraits after the ceremony to avoid disrupting the service. Include arch photos in the overall timeline.
Second Shooter Benefits
Capture more angles and moments.
A second photographer can focus exclusively on arch shots while the primary covers other aspects. This ensures comprehensive coverage of the arch’s role in the day.
Conclusion
Wedding arch photography combines technical skill with artistic vision to create images that capture the magic of your special day. By understanding the arch’s role as a framing element and mastering lighting, composition, and timing, you can create photographs that will be cherished for generations.
Remember that the most beautiful arch photos come from authentic moments and creative perspectives. Don’t be afraid to experiment with angles and techniques while keeping the focus on the couple’s love story.
As your wedding planner, I always emphasize the importance of collaboration between planners, photographers, and couples. A well-photographed arch becomes more than decoration—it becomes the visual heart of your wedding story.
Choose your photographer wisely, communicate your vision clearly, and let the arch’s natural beauty shine through. Your wedding arch photos will preserve the romance and elegance of your ceremony, creating memories that last a lifetime.